Eyeliner Tape: Your Simple Guide To Perfect Eye Looks Today
Putting on eyeliner, especially getting that crisp, neat line, can feel like a real challenge for many people. It’s a makeup step that seems so simple, but applying it is one of the hardest makeup techniques, as a matter of fact. Whether you’re aiming for a sharp wing or just a defined lash line, that little slip of the hand can mess up your whole look, which is pretty frustrating, you know?
Many folks find themselves struggling with liquid and gel liners, which are better for precision looks like the cat eye, but also demand a steady hand. You might try to plant your elbow on a flat surface for stability, but even then, getting both sides to match can feel like a big puzzle. It's almost like a test of patience and skill, and sometimes, honestly, you just want an easier way to get that perfect finish.
This is where eyeliner tape comes into the picture, offering a helpful hand to anyone who finds eye makeup a bit tricky. It’s a simple tool that promises to make those precise lines much more achievable, and really, it can change your whole routine. We’re going to look at how this handy item can simplify your beauty life, so you can achieve those clean, sharp eye looks without all the fuss, and stuff.
Table of Contents
- What is Eyeliner Tape?
- Why People Use Eyeliner Tape
- How to Use Eyeliner Tape for a Great Look
- Different Kinds of Eyeliner Helpers
- Tips for Getting Your Best Eyeliner Results
- Common Eyeliner Tape Mistakes to Avoid
- Eyeliner Tape for Different Eye Shapes
- Frequently Asked Questions About Eyeliner Tape
- Ready to Try It?
What is Eyeliner Tape?
Eyeliner tape is a small, usually thin, adhesive strip designed to help you create clean, sharp lines when applying eye makeup. It’s like a temporary guide for your liquid or gel liner, ensuring your strokes stay straight and neat. Think of it as a little helper for your hands, especially when you are going for those very defined looks, you know?
This tape often comes in pre-cut shapes or rolls that you can cut yourself, depending on what kind of line you want. It sticks gently to your skin around the eye area, providing a firm edge against which you can draw your liner. This way, you get a crisp boundary, which is really helpful for precision looks like the cat eye, as we discussed earlier, in a way.
The idea behind it is pretty simple, actually. Eyeliner is a versatile makeup product used to define and enhance the eyes, but getting that perfect edge can be tough. This tape makes that part much easier, giving you a steady line without the need for an incredibly steady hand. It’s a tool that helps you achieve a polished appearance, even if you’re new to intricate eye makeup, so.
Why People Use Eyeliner Tape
People reach for eyeliner tape for a few key reasons, and it often comes down to making a difficult task simpler. One big reason is getting that perfect winged eyeliner look. That little flick at the corner of the eye can be notoriously hard to get just right, and making both eyes match can be even harder, which is sometimes a bit frustrating.
Another reason is for beginners. Applying eyeliner is one of the hardest makeup techniques, and starting out can feel overwhelming. Eyeliner tape gives new users a clear guide, building their confidence as they learn to control their liner. It’s like having training wheels for your eye makeup, so to speak.
For those who are in a hurry, this tape can also speed things up. Instead of spending a long time trying to fix smudges or uneven lines, you can just place the tape, draw, and remove it. This saves time and reduces the stress of getting ready, which is honestly quite a benefit for many people in their busy lives, you know?
It’s also great for creating consistent looks. If you want your eyeliner to look the same every time, using a tape guide helps ensure that uniformity. This consistency is something many makeup lovers really appreciate, especially for their everyday looks or when they want to make sure their eye makeup is just so, every single time, more or less.
How to Use Eyeliner Tape for a Great Look
Using eyeliner tape is pretty straightforward once you get the hang of it, and it can really change how you do your eye makeup. We’re going to walk through the steps, so you can get that clean, sharp line you’ve been wanting. It’s a simple process, honestly, that yields great results, as a matter of fact.
Preparing Your Skin
Before you stick any tape to your face, you want to make sure your skin is clean and dry. Any oils or leftover makeup can keep the tape from sticking well, or might even cause it to pull on your skin when you take it off. A clean base means a better stick and a smoother removal, you see.
Just gently wipe the area around your eyes with a bit of micellar water or a mild cleanser, then pat it dry. You don't want any lotions or creams right where the tape will go, as they can also mess with the adhesive. This simple step really helps make sure the tape does its job properly, which is pretty important for a good outcome, you know?
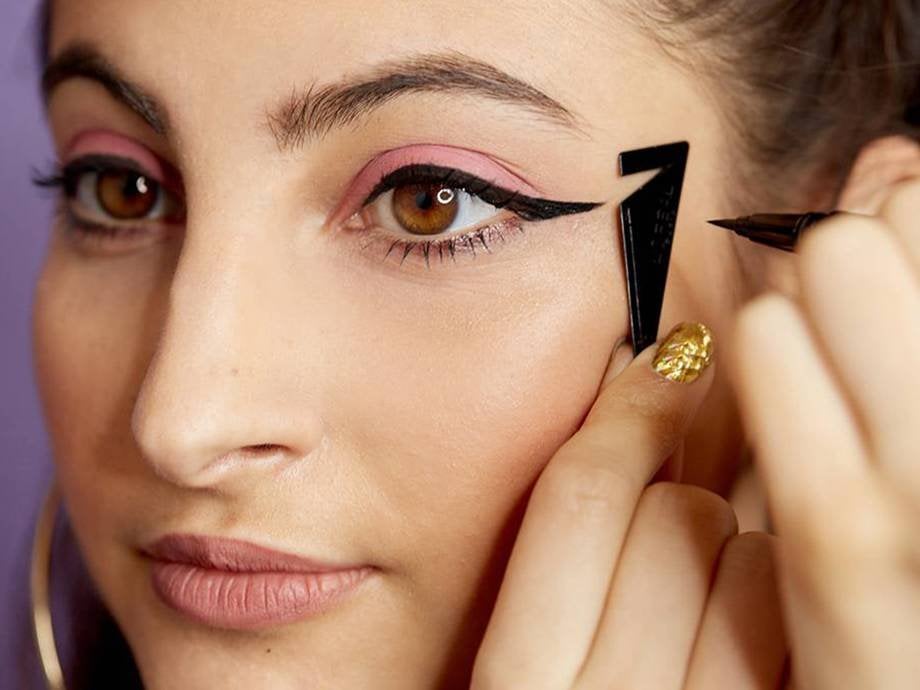
Positioning the Tape Just Right
This is arguably the most important step for getting the look you want. Take a piece of eyeliner tape and decide where you want your wing or line to go. For a classic winged look, you usually place the tape from the outer corner of your lower lash line, angled upwards towards the tail of your eyebrow.
The angle you pick will determine how dramatic or subtle your wing looks. A steeper angle gives a more lifted, cat-eye effect, while a less steep angle creates a softer, more natural lift. You might want to experiment a little bit with different angles to find what you like best for your eye shape, as a matter of fact.
Make sure the tape is pressed down firmly, especially along the edge where you’ll be drawing your line. You don't want any gaps, because that's where your liner might bleed underneath. A good, tight seal is key for a super crisp line, which is what we're aiming for, naturally.
It's also helpful to make sure both pieces of tape on each eye are placed at the same angle. You can use a mirror and even a ruler or the handle of a makeup brush to help line them up. Getting them even is what helps you achieve a symmetrical look, and that is very important for a balanced face, you know?
Applying Your Liner
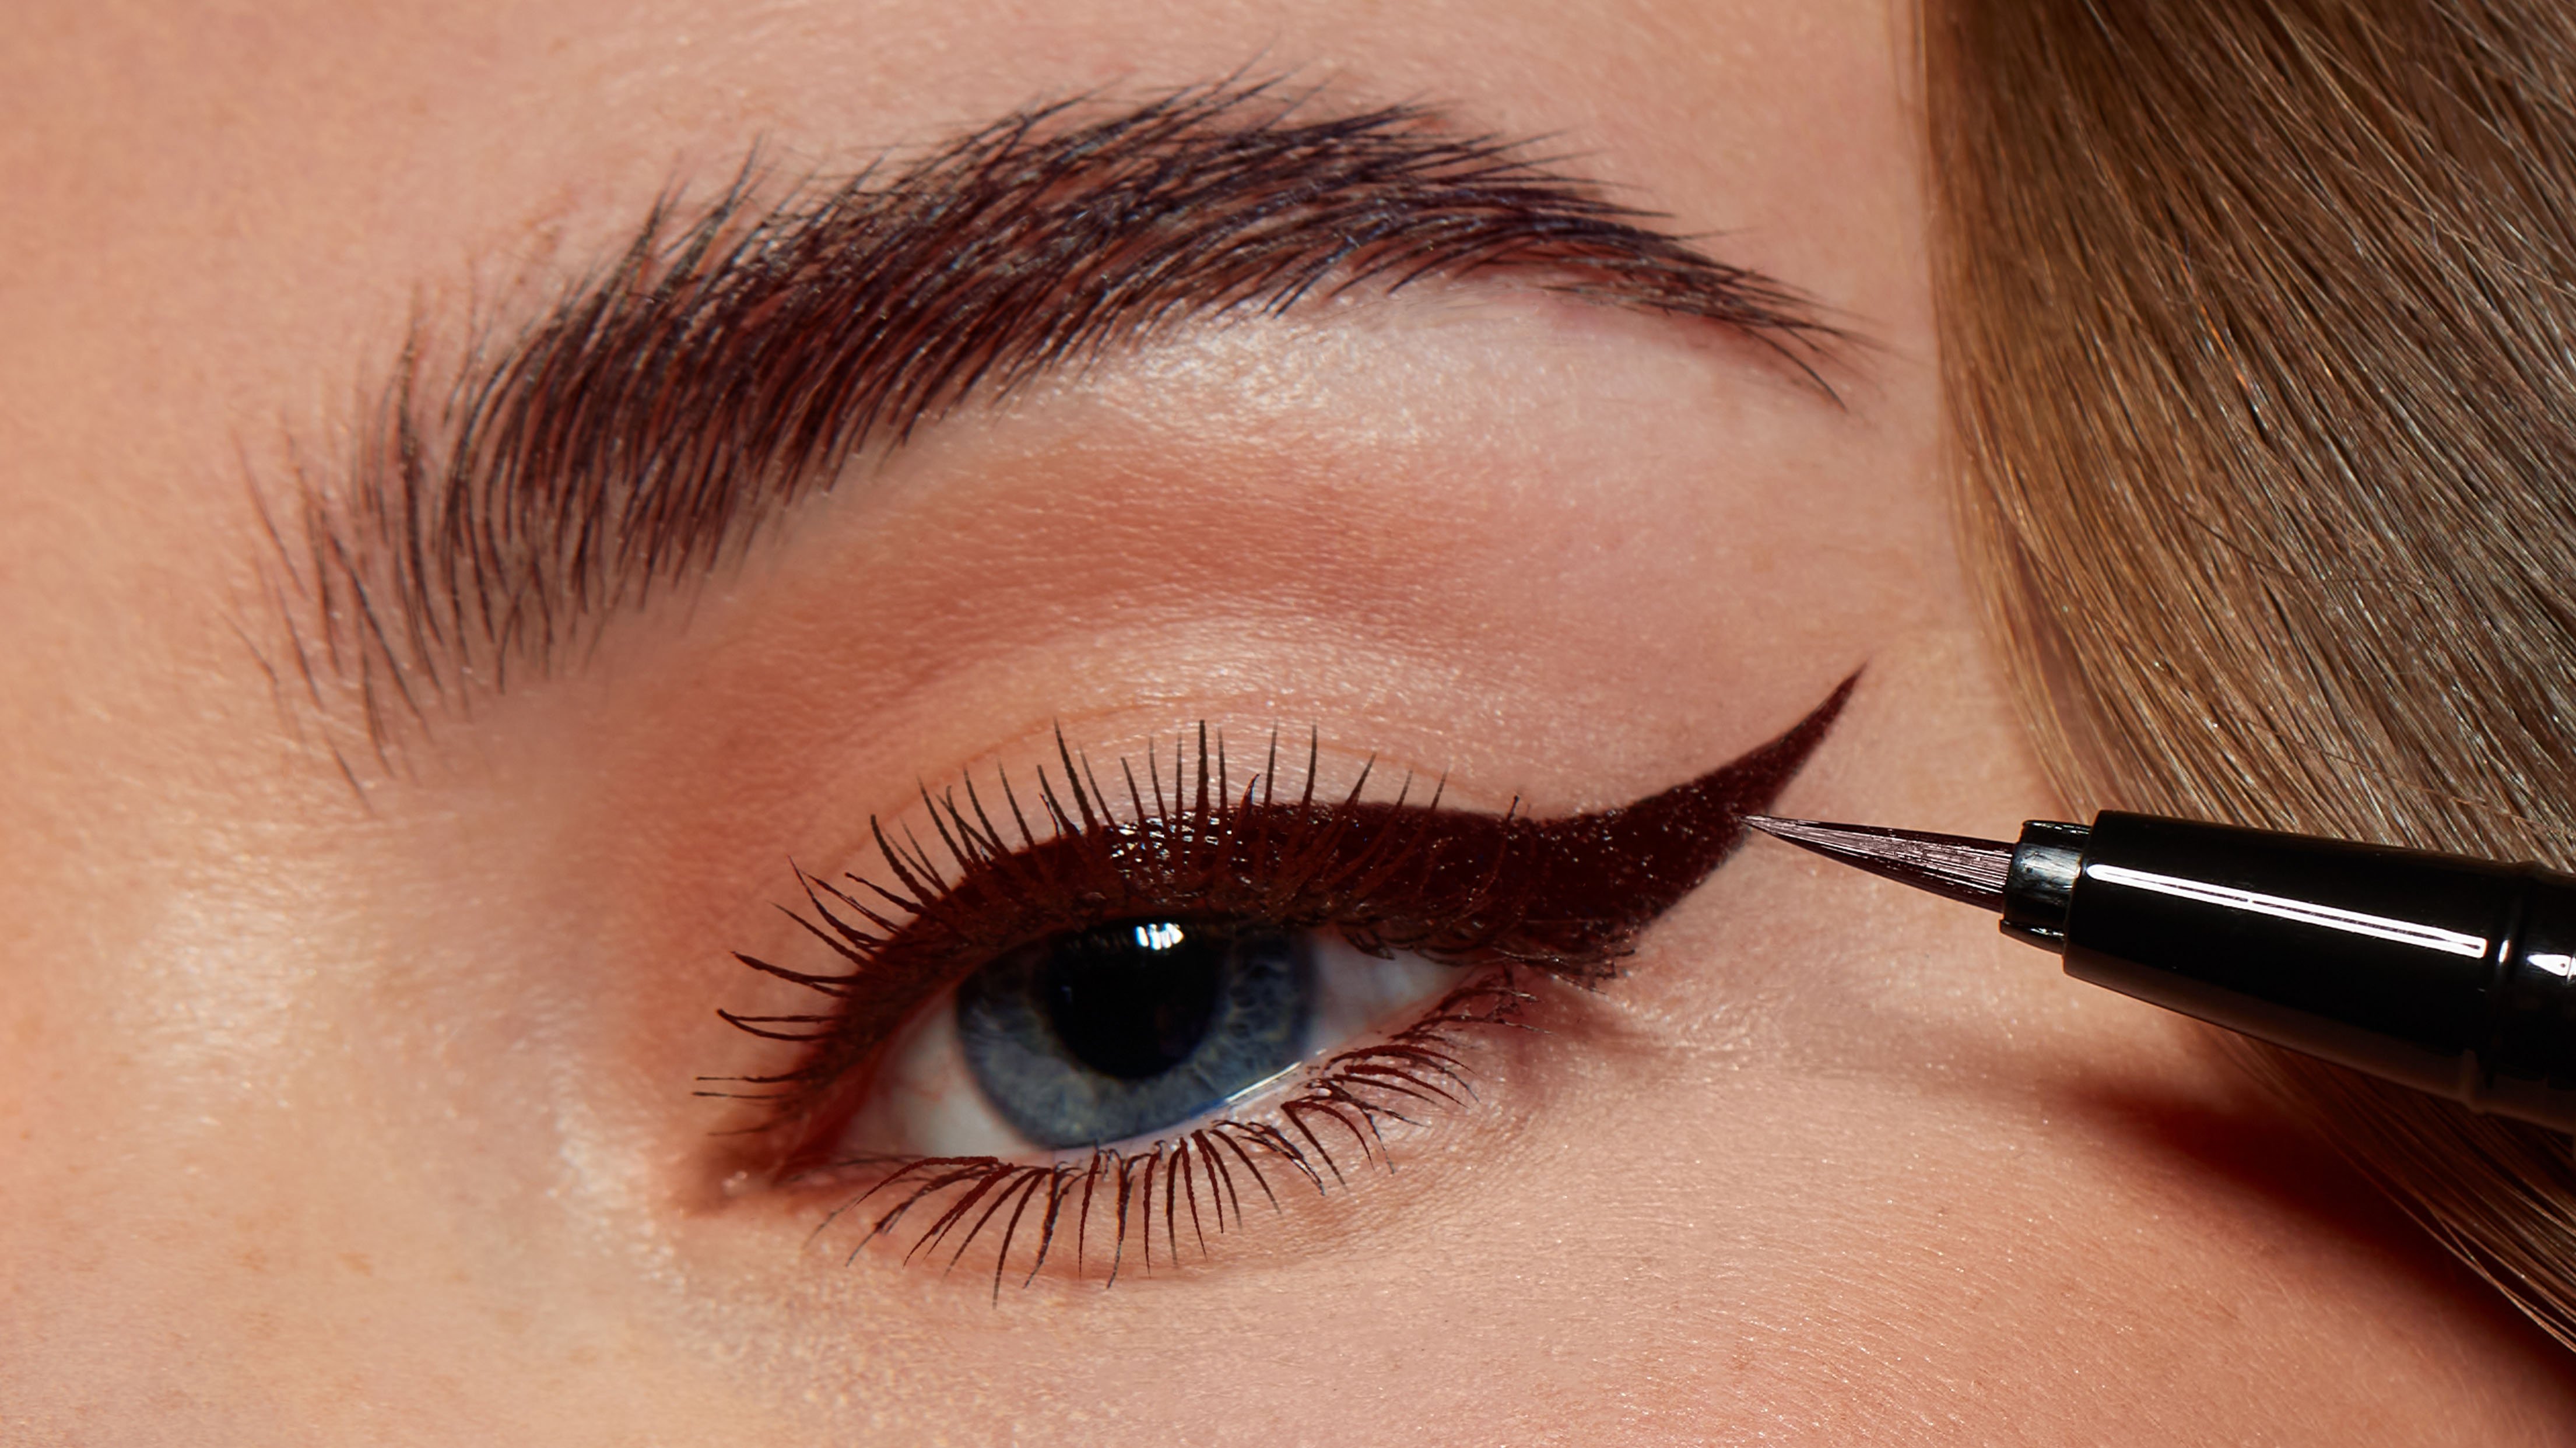
Once your tape is in place, you can apply your eyeliner. This is where the magic happens, as it were. You can use liquid, gel, or even a pencil liner for this, though liquid and gel liners are better for precision looks like the cat eye, as My text mentions. Just draw along the edge of the tape, filling in the space to create your desired line or wing.
Don't be afraid to go over the tape a little bit; that's what it's there for. The tape acts as a barrier, keeping your line perfectly straight. Use short, controlled strokes, or one smooth swipe, depending on your comfort level and the type of liner you're using. You can build up the thickness of your line if you want a bolder look, too.
Remember that eyeliner comes in various forms, including liquid, gel, pencil, and mechanical, each offering different finishes and effects. Pick the one you feel most comfortable with, or the one that gives you the finish you want. Our five picks define eyes and defy expectations, one swipe at a time, so pick your favorite, you know?
If you're using a liquid liner, give it a moment to dry before moving to the next step. This helps prevent smudging when you remove the tape. A little patience here goes a long way in getting a clean finish, which is quite important, you see.
Removing the Tape Carefully
After your liner has dried completely, it’s time to remove the tape. This step needs to be done gently. Pull the tape off slowly, moving it away from your eye. You want to peel it off in a smooth motion to avoid disturbing your fresh eyeliner or irritating your skin.
You should see a perfectly crisp, clean line where the tape was. If there are any tiny smudges or bits of liner that went astray, you can clean them up with a small, angled brush dipped in a bit of micellar water or makeup remover. This little touch-up ensures your line is absolutely perfect, which is honestly quite satisfying.
And just like that, you have a sharp, defined eyeliner look that probably took much less effort than doing it freehand. It's a simple trick that can make a big difference in your daily beauty routine, so it's worth trying, as a matter of fact.
Different Kinds of Eyeliner Helpers
When we talk about eyeliner tape, it's worth noting that there are a few variations and similar tools out there designed to help with liner application. It's not just one type of sticky strip, you know. These different kinds offer various levels of assistance and cater to different preferences, which is pretty neat.
Some products are literally rolls of low-tack adhesive tape, similar to medical tape, that you cut to your desired shape and size. These are quite versatile, as you can tailor them for any angle or length of wing you want. This customization is a big plus for people who like to experiment with their looks, naturally.
Then there are pre-cut eyeliner stencils. These are usually made of flexible plastic or silicone, and they have specific cut-outs for different eyeliner styles, like cat eyes, smoky eyes, or even more dramatic shapes. You hold them against your skin and fill in the stencil. They are reusable, which is a good thing for the environment and your wallet, too.
Some stencils might also come with adhesive backing, making them a hybrid between a full stencil and simple tape. These offer the best of both worlds: the specific shape of a stencil with the hands-free convenience of tape. You can pick between pencils and pots, mattes and metallics, blacks and brights — no matter what, you’re in for a treat with these tools, honestly.
There are also tools that aren't tape at all but serve a similar purpose, like eyeliner shields or guards. These are small, curved pieces of plastic or silicone that you hold against your lash line to prevent mascara or eyeliner from smudging onto your lid. While not tape, they share the goal of making eye makeup cleaner and easier, which is pretty much the main idea here, you know?
Tips for Getting Your Best Eyeliner Results
To really get the most out of your eyeliner tape, a few extra tips can make a big difference. These little tricks can help you achieve an even more polished and long-lasting look, which is what we all want, right?
Practice Makes Perfect: The first few times you use eyeliner tape, it might feel a bit awkward. Don't get discouraged! Keep trying different angles and tape placements. You'll soon find what works best for your eye shape and the look you're going for. It's like learning any new skill, honestly, it takes a little bit of time.
Use the Right Liner: While the tape helps with precision, the type of eyeliner you use still matters. Liquid and gel liners are generally better for precision looks like the cat eye, as they offer intense color and a smooth glide. A fine-tipped brush or applicator with your liner will also give you more control, which is pretty useful.
Set Your Liner: After you apply your eyeliner and remove the tape, consider setting it with a tiny bit of matching eyeshadow. Just gently pat a dark eyeshadow over your liner with a small brush. This can help prevent smudging and make your liner last longer throughout the day, which is a good thing, you know?
Don't Rush It: Even with the tape, taking your time can prevent mistakes. Rushing might lead to uneven lines or smudges. Give yourself a few extra moments, especially when placing the tape and when waiting for the liner to dry. Patience is a virtue here, arguably.
Keep it Clean: If you're using reusable stencils, make sure to clean them after each use. This prevents product buildup and keeps them hygienic for your next application. A quick wash with soap and water is usually enough, so it's fairly simple.
Consider Your Eye Shape: Not all eye shapes are the same, and what works for one person might need a slight adjustment for another. For instance, if you have hooded eyes, you might need to adjust the angle of your tape slightly to ensure the wing is visible when your eyes are open. We'll talk more about this later, too.
Common Eyeliner Tape Mistakes to Avoid
While eyeliner tape is a fantastic helper, there are a few common slip-ups that can prevent you from getting the best results. Knowing what to watch out for can save you some frustration and help you achieve that perfect line every time, which is pretty important, you know?
One frequent mistake is not pressing the tape down firmly enough. If the edges aren't completely sealed against your skin, liquid or gel liner can bleed underneath, leaving you with a messy, rather than crisp, line. Make sure you gently but firmly press along the entire edge of the tape where your liner will go, so.
Another common issue is removing the tape too soon, before your liner has had a chance to dry. This can cause the liner to smudge or lift off with the tape, ruining your clean line. Give your liquid or gel liner a good 30 seconds to a minute to set before peeling the tape away. Patience here really pays off, honestly.
Using tape that's too sticky can also be a problem. If the adhesive is too strong, it can pull on your delicate eye skin or even remove a bit of your foundation. Look for tapes specifically designed for makeup or sensitive skin, or try dabbing a stronger tape on the back of your hand a few times to reduce its stickiness before applying it to your face, as a matter of fact.
Placing the tape at an uneven angle on each eye is another common misstep. This leads to asymmetrical wings, which can throw off your whole look. Take a moment to check your angles in the mirror, perhaps using a straight edge like a ruler or a makeup brush handle to ensure both sides are matching, which is quite helpful, you know?
Finally, some people try to draw their line too thick or apply too much product right next to the tape. While the tape protects, over-applying can still lead to a thick, clumpy line that's hard to refine. Start with a thinner line and build up if you want more drama. Remember, less is often more when it comes to precision makeup, arguably.
Eyeliner Tape for Different Eye Shapes
The beauty of eyeliner tape is how adaptable it is, but understanding your eye shape can help you get the most out of it. Different eye shapes might need slightly different tape placements to achieve the most flattering look. It's not a one-size-fits-all thing, naturally, but it's very versatile, you know?
For those with **hooded eyes**, where skin folds over the eyelid, making the crease less visible, eyeliner can sometimes disappear when the eyes are open. To make your winged liner visible, try placing the tape at a slightly higher angle, aiming more directly towards the tail of your brow. This creates a wing that "lifts" over the hood, making it more apparent when your eyes are open, which is pretty neat.
If you have **monolid eyes**, which often have no visible crease, you can use eyeliner tape to create a beautiful, defined line that extends outwards. The tape can help you achieve a sharp, graphic line that really opens up the eye area. You might want to experiment with longer, more dramatic wings, as there's plenty of space to work with, arguably.
For **round eyes**, where the eyes appear quite open, you might want to use the tape to create a longer, more extended wing. This can help elongate the eye shape, giving a more almond-like appearance. Place the tape to extend the line outwards, rather than just upwards, so.
If your eyes are **almond-shaped**, which is often considered a balanced shape, you have a lot of flexibility. Eyeliner tape can help you perfect any style, from a subtle flick to a bold, dramatic wing. You can follow the natural upward curve of your lower lash line for a classic look, which is pretty simple, you know?
For **downturned eyes**, where the outer corners appear to drop slightly, eyeliner tape can be a great tool for creating an uplifting effect. Place the tape so that the wing angles upwards quite a bit, lifting the outer corner of your eye. This helps to counteract the downturn and gives a more lifted, open appearance, which is quite flattering, honestly.
The key, regardless of your eye shape, is to experiment a bit. Try different angles and lengths with your tape until you find what makes your eyes look their best. Remember, makeup is about playing and finding what makes you feel good, so have fun with it, you know?
Frequently Asked Questions About Eyeliner Tape
People often have questions about using eyeliner tape, especially if they're new to it. Here are some common inquiries that come up, and we’ll try to give you some helpful answers, as a matter of fact.
Is eyeliner tape good for beginners?
Absolutely, eyeliner tape is pretty much a fantastic tool for beginners. Eyeliner seems so simple, but applying it is one of the hardest makeup techniques, as My text reminds us. The tape gives you a clear, straight edge to draw against, taking away a lot of the guesswork and shaky hand problems. It helps build confidence, allowing you to practice the motion of applying liner without worrying about making a mess, which is a great starting point, honestly.
What can I use as a substitute for eyeliner tape?
If you don't have specific eyeliner tape, you can use a few household items as a substitute, arguably. Regular Scotch tape or painter's tape can work, but you should always reduce its stickiness first by dabbing it on the back of your hand a few times. This makes it less harsh on your delicate eye skin. Some people also use a credit card, a business card, or even the edge of a clean cotton pad as a straight edge guide. Just hold it firmly against your skin where you want your line, which is pretty simple, you know?
Does eyeliner tape work for hooded eyes?
Yes, eyeliner tape can definitely work for hooded eyes, and it can be a real game-changer for getting a visible wing. As mentioned before, for hooded eyes, the trick is often to adjust the angle of the tape. You might need to place it higher and angle it more sharply upwards, so the wing goes over the hooded part of your lid. This way, when your eyes are open, the wing is still clearly seen, which is very helpful, you know? It just takes a little bit of experimenting to find the best angle for your specific eye shape, as a matter of fact.
Ready to Try It?
Eyeliner tape, or any of its helpful cousins, offers a simple way to get those sharp, defined eyeliner looks that might otherwise feel out of reach. In the millennia since its invention, eyeliner has come a long way, and tools like this make it more accessible than ever. Whether you’re looking for a liquid liner for the perfect wing, a smudgeable kohl for a smoky eye, or anything in between, this tool can help you achieve it, so.
We tapped makeup artists and editors to get the low down on various eyeliner types, and the consensus is clear: precision makes a big difference. This tape helps deliver that precision without requiring years of practice. It's a handy little item that can really change your daily routine for the better, giving you more confidence in your makeup skills, which is a good feeling, you know?
So, why not give eyeliner tape a try? It might just become your new favorite beauty hack for defining eyes and defying expectations, one swipe at a time. You can learn more about eyeliner application tips on our site, and also find out more about different types of eyeliner products available. For more general beauty advice, you might want to check out resources like Allure's beauty guides, which are pretty informative, honestly.
How To Do Your Eyeliner According To Your Eye Shape - Eyeko
How To Apply Eyeliner Properly: 6 Tips | Makeup.com

Infinity Waterproof Eyeliner™
